
This help article will show you how to change the language to your preferred one and how to configure other options. You'll then also learn about Zohomail > Creating more email accounts
First time accessing your mailbox
When you log in to Zohomail with your admin email account, you'll see this screen. We'll first guide you through setting up your email account. Click Settings to see some features.
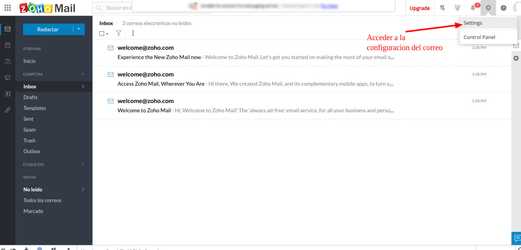
older accounts may have this view instead...
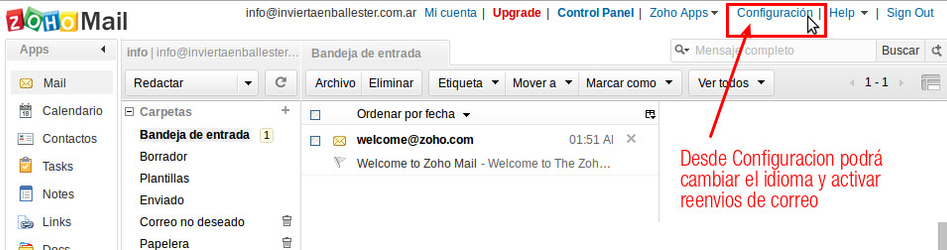
Changing the language
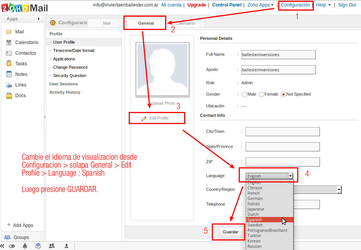
If the language you see is English, change the language from Settings > General > Edit Profile > Language: choose your language. Then click Save.
Log out of your email account and log back in. The new language shown will be your chosen one.
Setting up forwarding
To forward all email to another personal or company account, follow the steps shown in the image. Note that Zoho will send an email to confirm the forwarding to your added account.
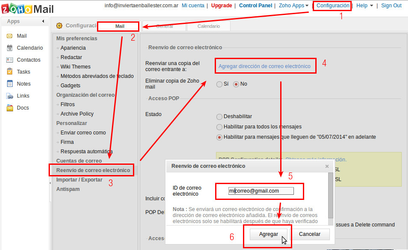
The mailbox set up for forwarding will receive an email containing a link to confirm the forwarding. Click the link to confirm.
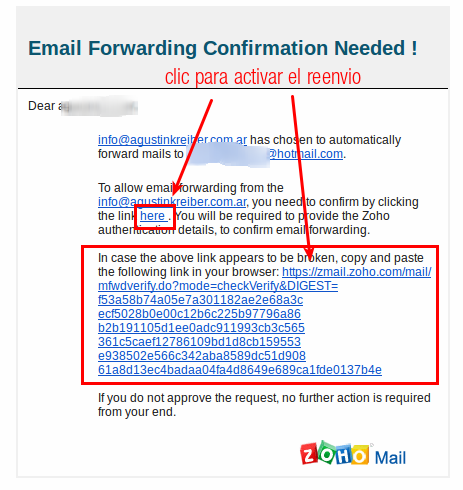
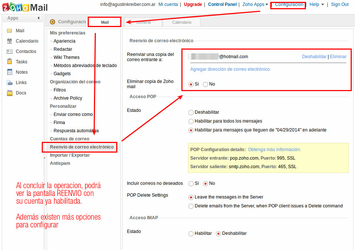
Once you've confirmed the email forwarding through the link, you can log in to your Zoho Mail account and verify that forwarding is enabled.
To Zohomail > Create more email accounts you can click Zohomail > Create more email accounts.
⚠ Attention: Zohomail is not a Mapaprop service, and Mapaprop provides no warranty over it, nor is it the owner or administrator of the service. You are the owner of your Zoho account, and you are free to use it with Mapaprop or any other hosting provider.